
Beacon Pyramid Resource Planner
Introduction
Plan the Effect Before Spending Resources
A beacon pyramid converts stored minerals into useful status effects around a fixed location. The practical goal is not always the biggest pyramid: build the smallest tier that supplies your required effect and covers your work area. Speed helps around a base, while Haste supports excavation. A complete four-layer pyramid unlocks stronger primary effects or Regeneration, but requires substantially more material.
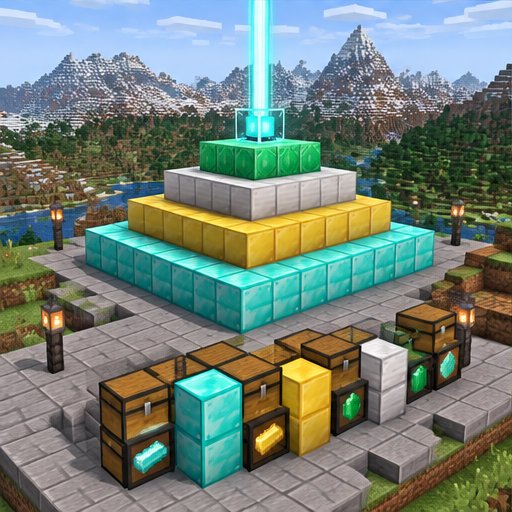
This guide covers standard modern Java and Bedrock survival mechanics. Modified servers can change beacon behavior, recipes, or effect limits, so validate the first completed tier before committing your whole stockpile.
Materials and Exact Pyramid Costs
Valid foundation materials are blocks of iron, gold, emerald, diamond, and netherite. You may mix these freely within every layer; expensive blocks do not improve range or effect strength. Raw iron blocks, raw gold blocks, copper blocks, lapis blocks, and decorative substitutes do not count. Iron is often practical, but use whichever valid material you can replenish without exhausting tools, armor, or other projects.
For one beacon, a one-layer pyramid needs a solid 3-by-3 layer: 9 blocks. Two layers require 5-by-5 plus 3-by-3: 34 blocks total. Three layers require 7-by-7, 5-by-5, and 3-by-3: 83 blocks. Four layers require 9-by-9, 7-by-7, 5-by-5, and 3-by-3: 164 blocks. These are filled squares, not hollow borders.
If using only iron or gold, the totals are 81, 306, 747, or 1,476 ingots respectively. Emerald and diamond totals are the same numbers of individual gems. For a mixed pyramid, count finished mineral blocks rather than combining unlike raw resources. A full pyramid is two stacks plus 36 blocks. Upgrading from one to two layers costs 25 additional blocks, then 49, then 81.
The beacon itself requires five glass blocks, three obsidian, and one nether star obtained from defeating the Wither. Budget separately for that dangerous encounter. Also bring a pickaxe suitable for recovering your chosen foundation blocks, a shovel for clearing soil, temporary markers, lighting, and at least one iron ingot, gold ingot, emerald, diamond, or netherite ingot for selecting an effect.
Choose Your Tier and Coverage
One layer unlocks Speed I or Haste I. Two layers add Resistance I and Jump Boost I. Three layers add Strength I. Four layers unlock the secondary selection: add Regeneration or upgrade the selected primary effect to level II. Haste II therefore needs all four layers; simply placing a beacon on a larger-looking hollow structure will not work.
Standard horizontal coverage extends 20, 30, 40, or 50 blocks from the beacon for tiers one through four. Treat this as square coverage, not a circular radius. Vertical coverage is asymmetric and edition-dependent: it extends only the tier’s range downward, while upward coverage is much taller. Java carries the effect upward through the world; Bedrock has its own upward limit. For deep mines, placing the beacon near the working elevation or below it is safer than assuming a surface beacon reaches bedrock.
Build and Activate in Order
Step 1: Mark the beacon’s position and the boundaries of your actual work area. Check both horizontal distance and excavation depth. If the project exceeds one beacon’s coverage, plan to relocate the beacon between stages or build additional stations rather than buying more expensive foundation materials.
Step 2: Reserve a clear beam route upward. Opaque blocks normally obstruct activation; glass, including stained glass, is suitable for a covered beam shaft. Transparency rules have exceptions, including bedrock, so appearance alone is not a reliable test. A plain open shaft is the simplest diagnostic arrangement. When opening a shaft underground, watch for falling gravel, water, lava, and hostile mobs.
Step 3: Sort resources into labeled storage and count the target tier’s finished blocks. If supplied by an automated collection system, provide spare chest capacity and check it manually; do not assume a full chest stops the upstream farm safely. Keep a reserve of useful ingots outside the pyramid budget.
Step 4: Build the largest bottom square first, then center each smaller square above it. For four layers, the 9-by-9 base supports 7-by-7, then 5-by-5, then 3-by-3. Place the beacon directly on the center block of the top layer. Fill every interior position with a valid block.
Step 5: Open the beacon interface, choose an unlocked primary effect, insert one accepted payment item, and confirm. On a full pyramid, select the desired secondary option too. Payment is consumed when confirming a configuration; beacons do not continuously burn fuel.
Step 6: Test at the center, each work-area edge, and the lowest planned elevation. Allow several seconds for effects to update. Effects linger briefly after leaving coverage, so an active icon immediately outside the boundary does not prove that location is covered.
Troubleshooting and Practical Alternatives
If the beam is absent, inspect the overhead column and all foundation layers for missing or invalid blocks. If the beam appears but no effect arrives, confirm that a paid selection was completed and wait for an update. If level II is unavailable, check the entire four-layer structure and secondary selection.
Haste II does not make every block instantly break. Common stone excavation additionally needs an Efficiency V diamond or netherite pickaxe; tougher blocks such as deepslate behave differently. Mining Fatigue, underwater penalties, and being airborne can also slow mining. Test representative blocks before planning an excavation around instant breaking.
If server settings prevent normal beacon operation, verify expectations with the administrator and use enchanted tools or ordinary Speed potions where appropriate. A smaller working beacon is also a sensible interim investment. Light surrounding solid surfaces, protect open shafts, and test uncertain layouts in a separate creative copy before risking survival resources.
Please support us by visiting one of our partners: Amazon